Mastering the Monitoring Stand in Palworld: A Guide to Optimizing Pal Workflow in 2026
Master Palworld's Monitoring Stand to unlock ultimate base management, balancing ruthless efficiency with compassionate Pal care. This command center is your key to optimizing workforce productivity and long-term creature health.
As a seasoned Palworld player, I've come to understand that the life of a Pal under my command is not always a leisurely one. While we form bonds with these creatures, the demands of base building and resource management often push us to maximize their utility. However, the game provides a fascinating tool that allows us to modulate this pressure: the Monitoring Stand. This unique structure isn't just a piece of furniture; it's a command podium, a symbol of authority from which I can oversee the entire operation of my base. It represents a core gameplay choice between ruthless efficiency and compassionate management. I can stand atop it and issue orders that push my Pals to their absolute limits, or I can adopt a more lenient approach to preserve their sanity and long-term health. It's a constant balance between ambition and ethics in this vibrant, creature-filled world.
Unlocking and Crafting Your Command Center
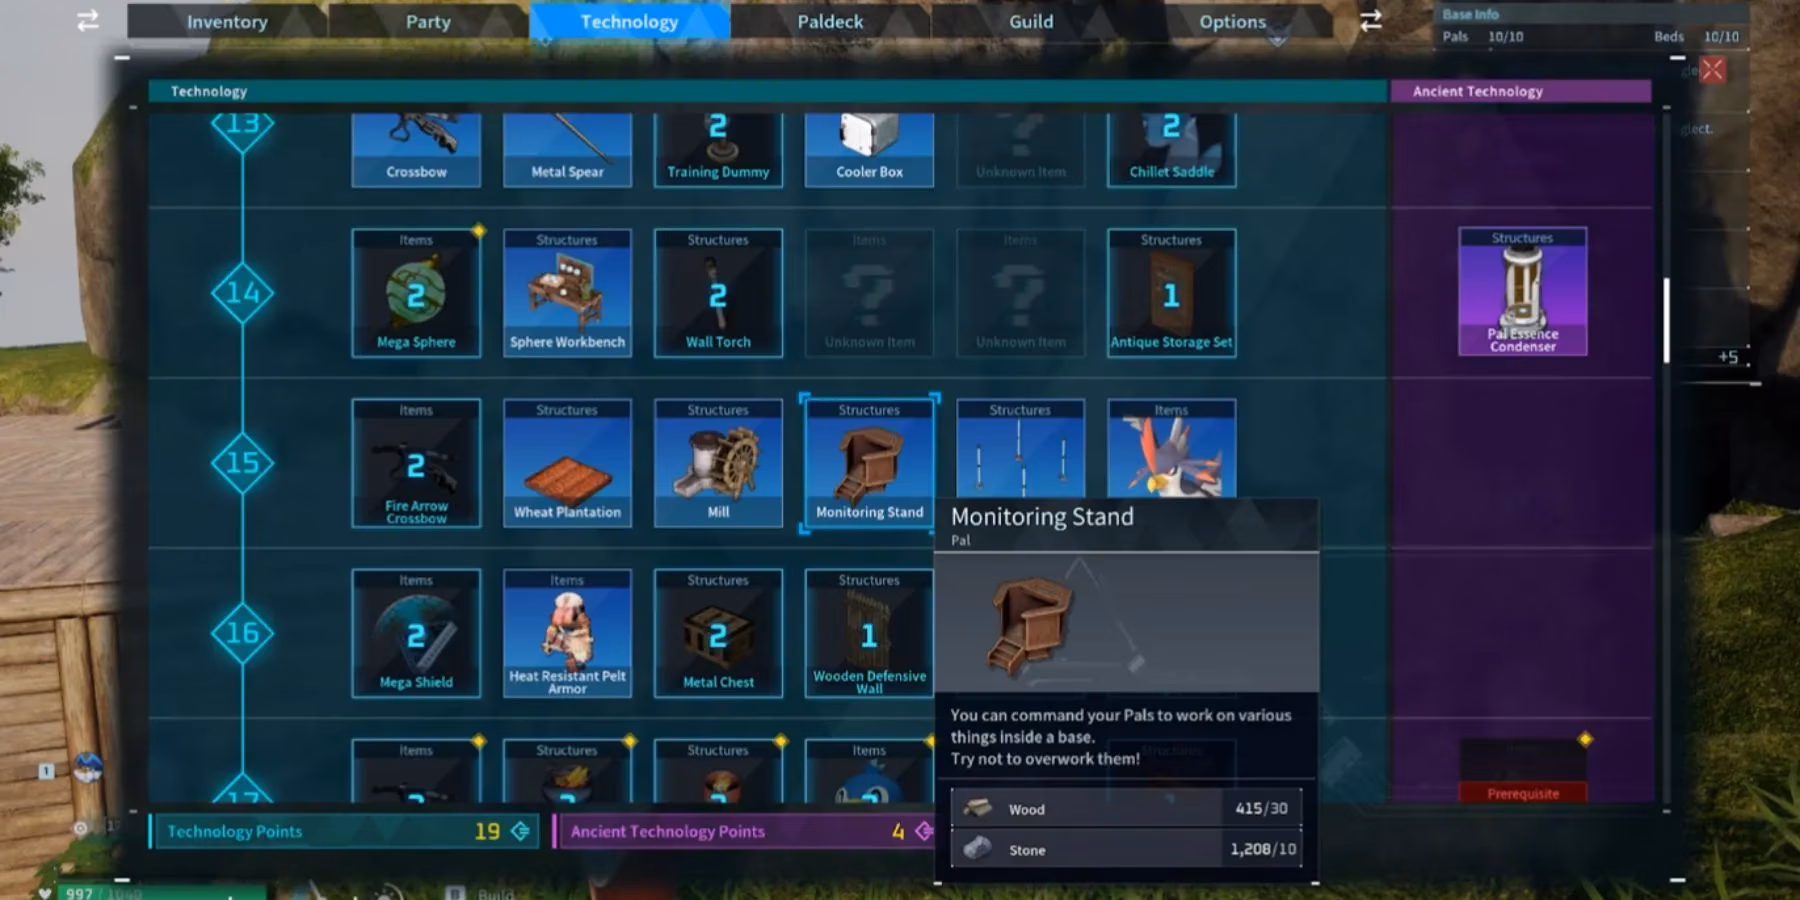
Acquiring this pivotal structure is a key mid-game milestone. To unlock the  Monitoring Stand blueprint, I needed to reach Player Level 15. Upon hitting this level, I invested 2 precious Technology Points in the Technology menu to learn its schematics. The crafting requirements are refreshingly straightforward, especially for a structure with such profound implications:
-
x30 Wood
-
x10 Stone
Gathering these fundamental resources was a trivial task at that stage, allowing me to construct the stand almost immediately after unlocking it. Its simplicity is deceptive, hinting at the complex management layers it unlocks.
The Three Tiers of Workforce Management
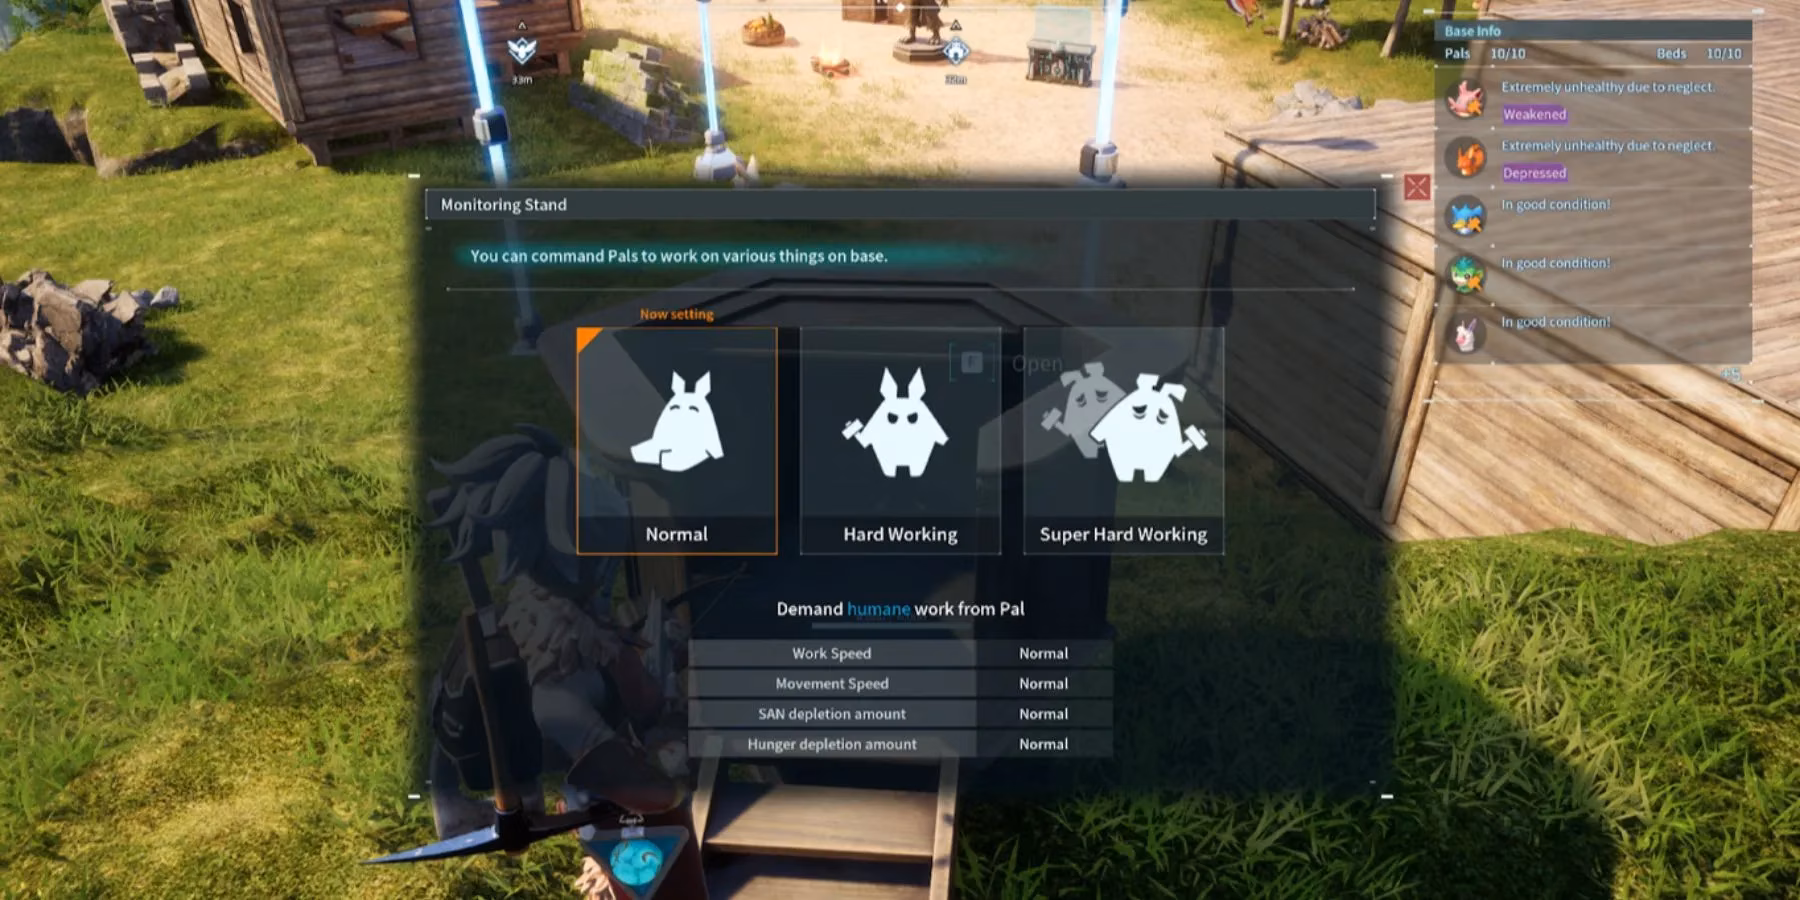
Once constructed, I placed my Monitoring Stand in a central, elevated location within my base—a literal and figurative position of oversight. Interacting with it opens a crucial configuration menu with three distinct work policies. Each setting dictates the tempo of my entire base's operations, affecting every Pal assigned to a job.
Here’s a breakdown of the modes, their effects, and my personal assessment:
| Work Mode | Productivity | Sanity Drain | Calorie Consumption | Recommended Use Case |
|---|---|---|---|---|
| Normal 🟢 | Standard Speed | Slow & Steady | Normal Rate | Default & Long-Term - The perfect balance for sustainable base growth. |
| Hard Working 🟡 | High ⬆️ | Rapid ⬆️⬆️ | Accelerated ⬆️ | Short Bursts - For urgent crafting or when you have surplus food and medical supplies. |
| Super Hard Working 🔴 | Maximum ⬆️⬆️⬆️ | Severe ⬆️⬆️⬆️ | Very High ⬆️⬆️ | Critical Emergencies Only - High risk of injury, starvation, and mental breakdown. |
Strategic Implementation and Pitfalls
Choosing a mode isn't just a slider for speed; it's a strategic decision with cascading consequences. Activating Hard Working or Super Hard Working acts like injecting a potent stimulant into my base's economy. Production queues clear rapidly, ore smelts faster, and fields are harvested in record time. This is invaluable when I'm preparing for a major expedition or need to craft a critical piece of gear before a boss fight.
However, this boost comes at a steep cost. Pals under these intense regimens will see their Sanity plummet and their Hunger meters drain alarmingly fast. A Pal with depleted sanity might refuse to work, become sick, or even start damaging the base structures. This forces me to maintain a robust support system:
-
A well-stocked food supply (like baked berries or better meals) is non-negotiable.
-
Having surplus Pals in the base to rotate out exhausted workers becomes essential.
-
Medical items like the controversial
 Strange Juice can be used to forcibly restore sanity, but it feels like a morally grey shortcut.
Through extensive play, I've learned that using the intense modes for prolonged periods is a recipe for disaster. It creates a vicious cycle of treating symptoms (hunger, insanity) rather than fostering a healthy, productive ecosystem. The Normal mode is the cornerstone of a stable, expanding base. It's the setting I use 90% of the time, only switching to higher gears for specific, time-sensitive objectives.
The Monitoring Stand's Role in the Modern Palworld Meta (2026)
As of 2026, with numerous game updates and an evolved player meta, the Monitoring Stand's role has been further refined. While not as flashy as late-game automation or powerful new Pals, it remains a critical mid-game management tool. Its true power lies in its flexibility. For players focusing on efficiency and speed-running certain production goals, mastering the stand's modes is mandatory. For role-players or those focused on Pal well-being, it serves as a constant reminder of the managerial choices we make.
In my current sprawling base, I use it tactically. Perhaps I'll set everyone to Hard Working for one in-game day to push through a large batch of ammunition and refined ingots. Once that goal is met, I immediately revert to Normal, allowing my workforce to recover in their hot springs and feast at the feed box. This rhythmic, pulsed use of authority has proven far more effective and sustainable than any form of constant, harsh oversight. The Monitoring Stand, therefore, is less about relentless dictatorship and more about understanding and manipulating the rhythm of your base's heartbeat—knowing when to push and, more importantly, when to let your Pals breathe.